
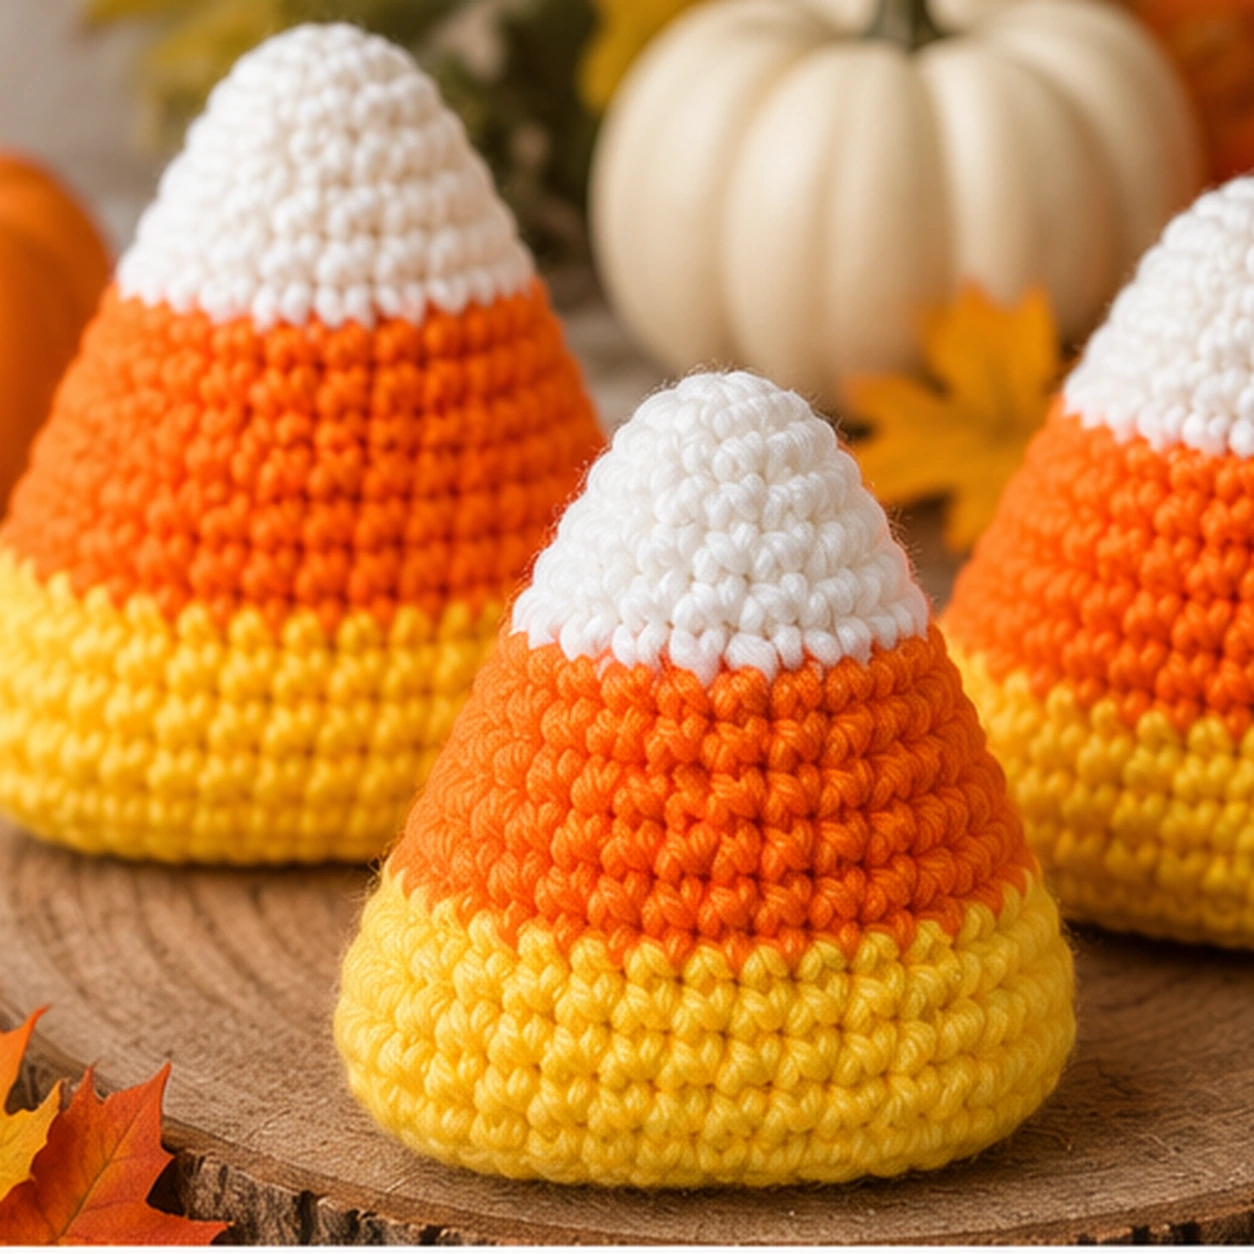
Crochet candy corn pattern: this beginner Halloween project is worked from the narrow white tip toward the wider yellow base. The shape grows gradually with only three increases on every second round, so there are no decreases and no separate body pieces to sew together.
How do you crochet a candy corn?
Start with six single crochet stitches in a magic ring. Work one plain round, then increase by three stitches on every second round. Crochet six rounds in white, six rounds in orange and six rounds in yellow. Stuff the cone lightly, flatten the final opening and sew the base closed.
Because the project uses the same basic construction from beginning to end, it is a practical first amigurumi project for learning continuous rounds and clean color changes. The three color blocks also make it easy to see your progress.
If you are building a full Halloween crochet collection, pair this project with our easy crochet pumpkin pattern. The two shapes look especially good together on a shelf, entryway table or fall centerpiece.
What you will find in this pattern
How this crochet candy corn pattern is constructed
The candy corn is a simple tapered tube. You begin at the white tip and add only three stitches on each increase round. A plain round between increase rounds adds height without making the sides expand too quickly.
- ✓ Worked from the white tip downward.
- ✓ Only single crochet and increases are required.
- ✓ Three equal six-round color sections.
- ✓ Base is flattened and sewn closed.
Materials for the candy corn
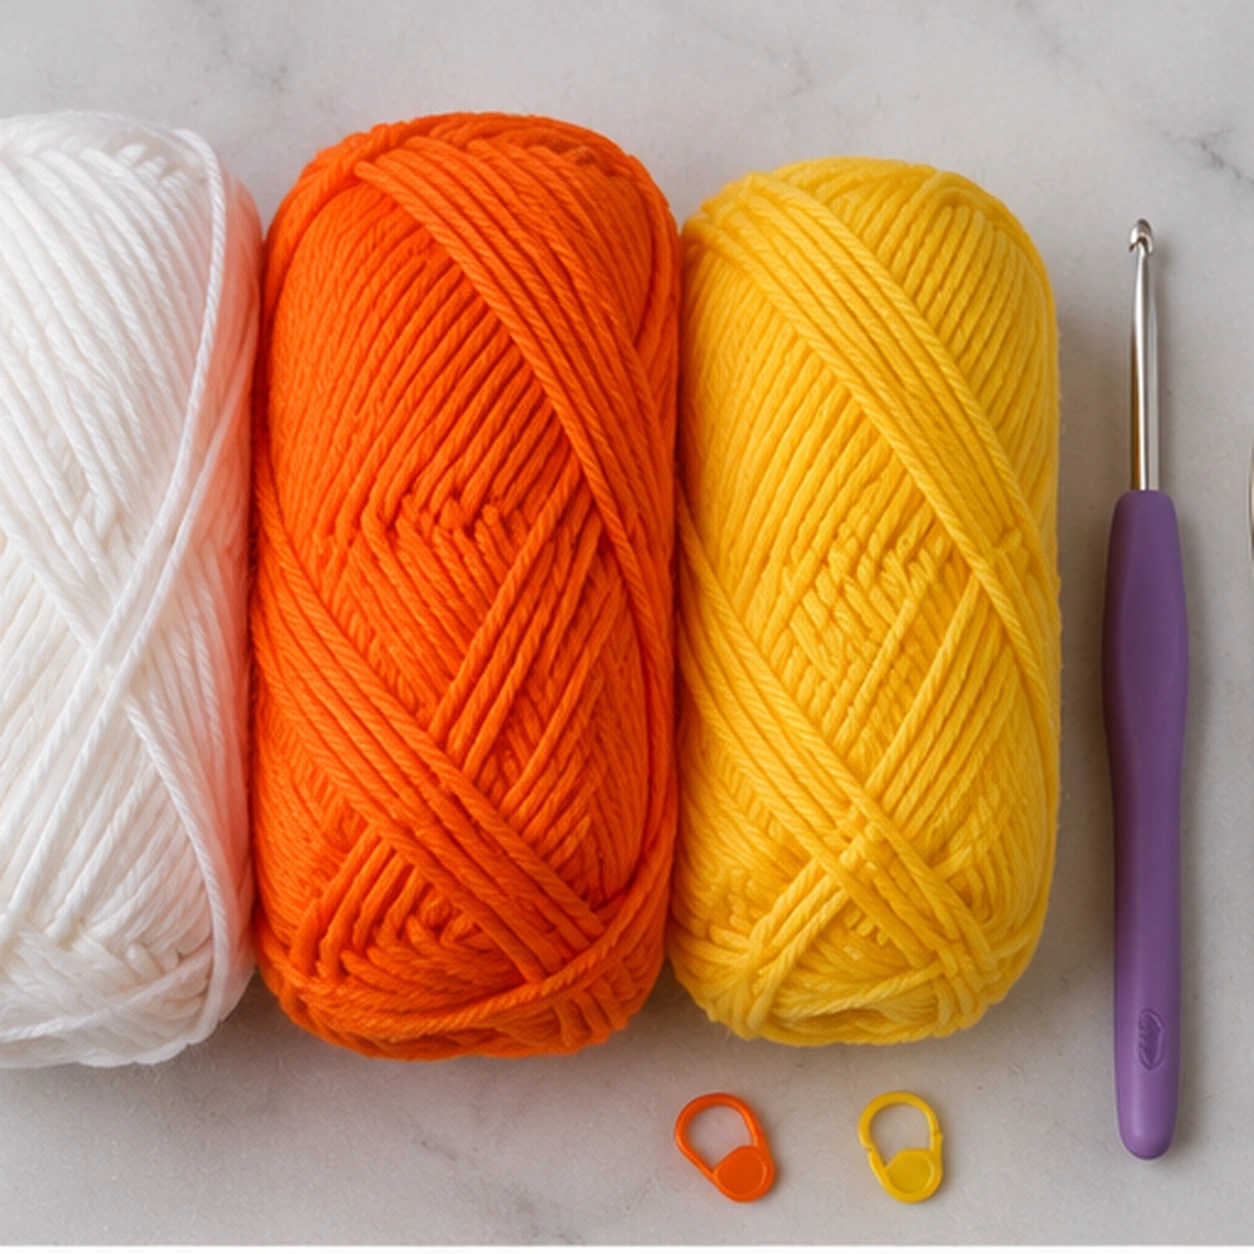
You will need
- medium weight #4 yarn in white
- medium weight #4 yarn in orange
- medium weight #4 yarn in yellow
- 4 mm crochet hook
- polyester fiberfill
- stitch marker
- tapestry needle
- scissors
- optional black embroidery yarn
Best yarn for this project
A smooth acrylic or cotton blend is easy to count and gives the candy corn a defined shape. Use the same yarn line for all three colors if possible so the thickness stays consistent across the color changes.
Stitches and abbreviations
US crochet terms
- MR = magic ring
- sc = single crochet
- inc = 2 single crochet in the same stitch
- st / sts = stitch / stitches
Pattern notes
Work in continuous spiral rounds. Do not join with a slip stitch at the end of each round. Move the stitch marker to the first stitch of every new round.
The pattern uses standard US crochet abbreviations. For a reference list, see the Craft Yarn Council crochet abbreviations.
Finished size and gauge
Using worsted weight yarn and a 4 mm hook, the finished candy corn should measure approximately 4 in (10 cm) tall and around 3 in (7.5 cm) wide at the base after stuffing.
Gauge is not critical for this decorative project. Your stitches should simply be firm enough that the fiberfill does not show between them.
Easy crochet candy corn pattern step by step
White tip
Start the pointed tip
With white yarn, make a magic ring and work 6 single crochet stitches into the ring. Pull the ring closed and place your marker in the first stitch.
Round 1: 6 sc
Hold the narrow shape
Work one single crochet in every stitch.
Round 2: 6 sc
Add the first three increases
Repeat one single crochet, then one increase, three times around.
Round 3: (1 sc, inc) x 3 = 9 sts
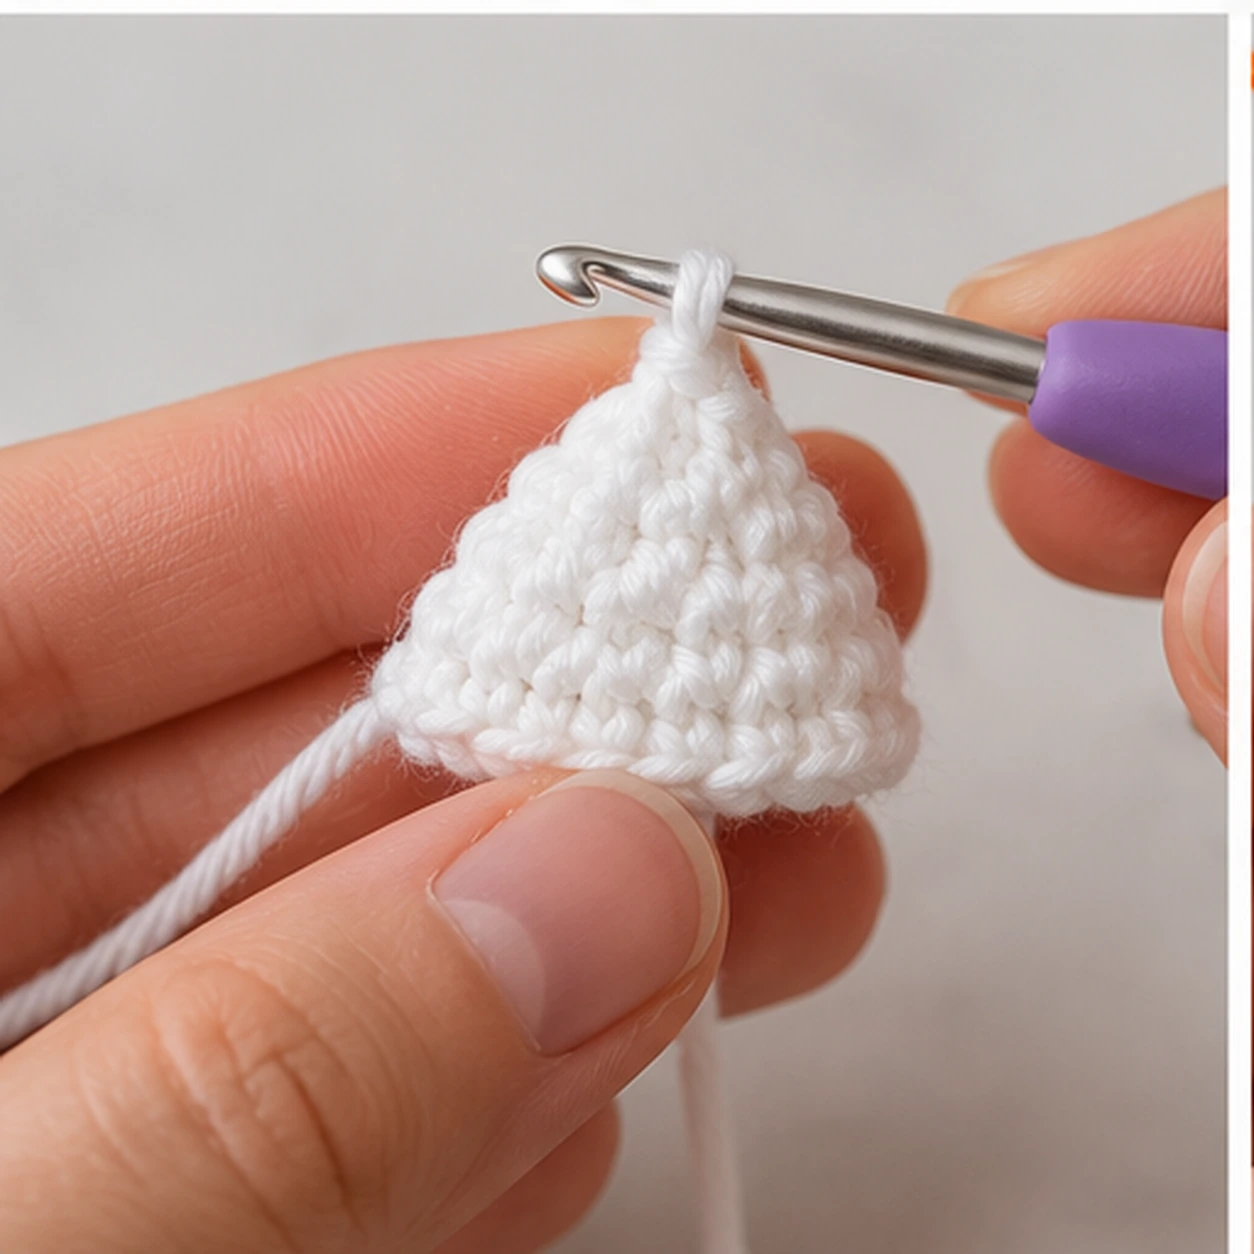
Complete the white section
Round 4: sc around. Round 5: repeat 2 sc, inc three times. Round 6: sc around.
R4: 9 sts, R5: 12 sts, R6: 12 sts
Crochet candy corn pattern color changes
Change to orange while completing the final stitch of Round 6. Insert the hook into the last stitch, yarn over with white and pull up a loop. Drop the white yarn, yarn over with orange and pull the orange through both loops on the hook.
Crochet the orange section
Continue the same rhythm, adding three stitches on every odd-numbered round and working one plain round after each increase round.
R7: 15, R8: 15, R9: 18, R10: 18, R11: 21, R12: 21

Finish with yellow
Change to yellow at the end of Round 12. Continue increasing in the same three-point rhythm until you have 30 stitches.
R13: 24, R14: 24, R15: 27, R16: 27, R17: 30, R18: 30
Stuff and close the candy corn
Fasten off after Round 18 and leave a tail about 18 in (45 cm) long. Add fiberfill in small pieces, starting at the white tip. Use the blunt end of your crochet hook or a stuffing tool to push a small amount into the top without stretching the stitches.
Continue filling the orange and yellow sections. The candy corn should feel plump but still compress slightly when you squeeze it. Overstuffing can make the tapered sides look round.
Flatten the final 30-stitch opening so the front and back edges meet. Thread the long tail onto your tapestry needle and whip stitch through both layers across the base. Secure the yarn and weave the tail inside.

Optional embroidered face
For a cute Halloween character, use black yarn to embroider two small eyes and a short smile on the orange section before adding the final stuffing. Embroidery keeps the project simple and avoids plastic parts.
Easy candy corn variations
Classic Halloween colors
Use white, orange and yellow for the traditional candy corn look.
Pastel candy corn
Replace the orange and yellow with dusty peach and pale mustard for a softer fall palette.
Mini ornament
Use sport or DK yarn with a smaller hook and add a short chain loop at the top.
Chunky candy corn
Use bulky or chenille yarn and a hook that creates firm stitches for a larger plush decoration.
Common crochet candy corn mistakes
The shape looks too round
Check that you only increase on every second round. Increasing every round makes the sides flare too quickly.
The color change has a large step
Change colors during the final pull-through of the previous round and keep the stitch marker in the correct first stitch.
Stuffing shows through
Use firmer tension or a slightly smaller hook. Also avoid forcing too much fiberfill into the piece.
The candy corn will not stand
Flatten the yellow opening evenly before sewing and keep most of the stuffing slightly above the seam so the base stays broad and flat.
Frequently asked questions about the crochet candy corn pattern
Is this crochet candy corn pattern suitable for beginners?
Yes. The project uses a magic ring, single crochet and simple increases. There are no decreases in the body.
Do I have to use white, orange and yellow?
No. Those are the traditional candy corn colors, but you can use any three-color combination you like.
Can I make the candy corn larger?
The simplest method is to use thicker yarn with an appropriate hook. You can also continue the same increase rhythm for additional rounds before closing the base.
Can I use chenille yarn?
Yes. Chenille makes a soft plush candy corn, but stitch visibility is lower, so use a marker and count each round carefully.
How much should I stuff it?
Use enough fiberfill to hold the triangular shape without stretching the stitches. The piece should still feel slightly compressible.
Can I make a candy corn garland?
Yes. Use lighter yarn for smaller pieces, add a chain loop to the white tip, and attach several finished candy corns to a long crochet chain.
Quick pattern to save
- White R1: 6 sc in MR.
- White R2: 6 sc.
- White R3: (1 sc, inc) x 3 = 9.
- White R4: 9 sc.
- White R5: (2 sc, inc) x 3 = 12.
- White R6: 12 sc.
- Orange R7: (3 sc, inc) x 3 = 15.
- Orange R8: 15 sc.
- Orange R9: (4 sc, inc) x 3 = 18.
- Orange R10: 18 sc.
- Orange R11: (5 sc, inc) x 3 = 21.
- Orange R12: 21 sc.
- Yellow R13: (6 sc, inc) x 3 = 24.
- Yellow R14: 24 sc.
- Yellow R15: (7 sc, inc) x 3 = 27.
- Yellow R16: 27 sc.
- Yellow R17: (8 sc, inc) x 3 = 30.
- Yellow R18: 30 sc.
- Stuff lightly, flatten the base and sew the opening closed.
Rimraam tip
Before cutting each old color, crochet two or three stitches with both yarn tails laid across the top of the previous round. This traps the tails inside the new stitches and reduces the amount of weaving in later.
A quick candy corn for your Halloween crochet collection
Three small yarn scraps, one simple increase rhythm and a flat sewn base are enough to make a colorful Halloween decoration in about an hour.
Note: finished size, yarn use and working time are approximate and can vary with yarn, hook size, tension and stuffing.
Helpful crochet candy corn video tutorial
If you prefer to watch the general construction and color changes first, this beginner-friendly candy corn tutorial from Rose and Lily Crochet is a useful visual reference. The yarn and stitch counts differ from the Rimraam version, so use the written instructions above for this pattern.
Video: external English-language tutorial on YouTube. The Rimraam written pattern above remains the main pattern for this project.