
Easy
3.5 mm
About 5 in wide
30 to 45 min
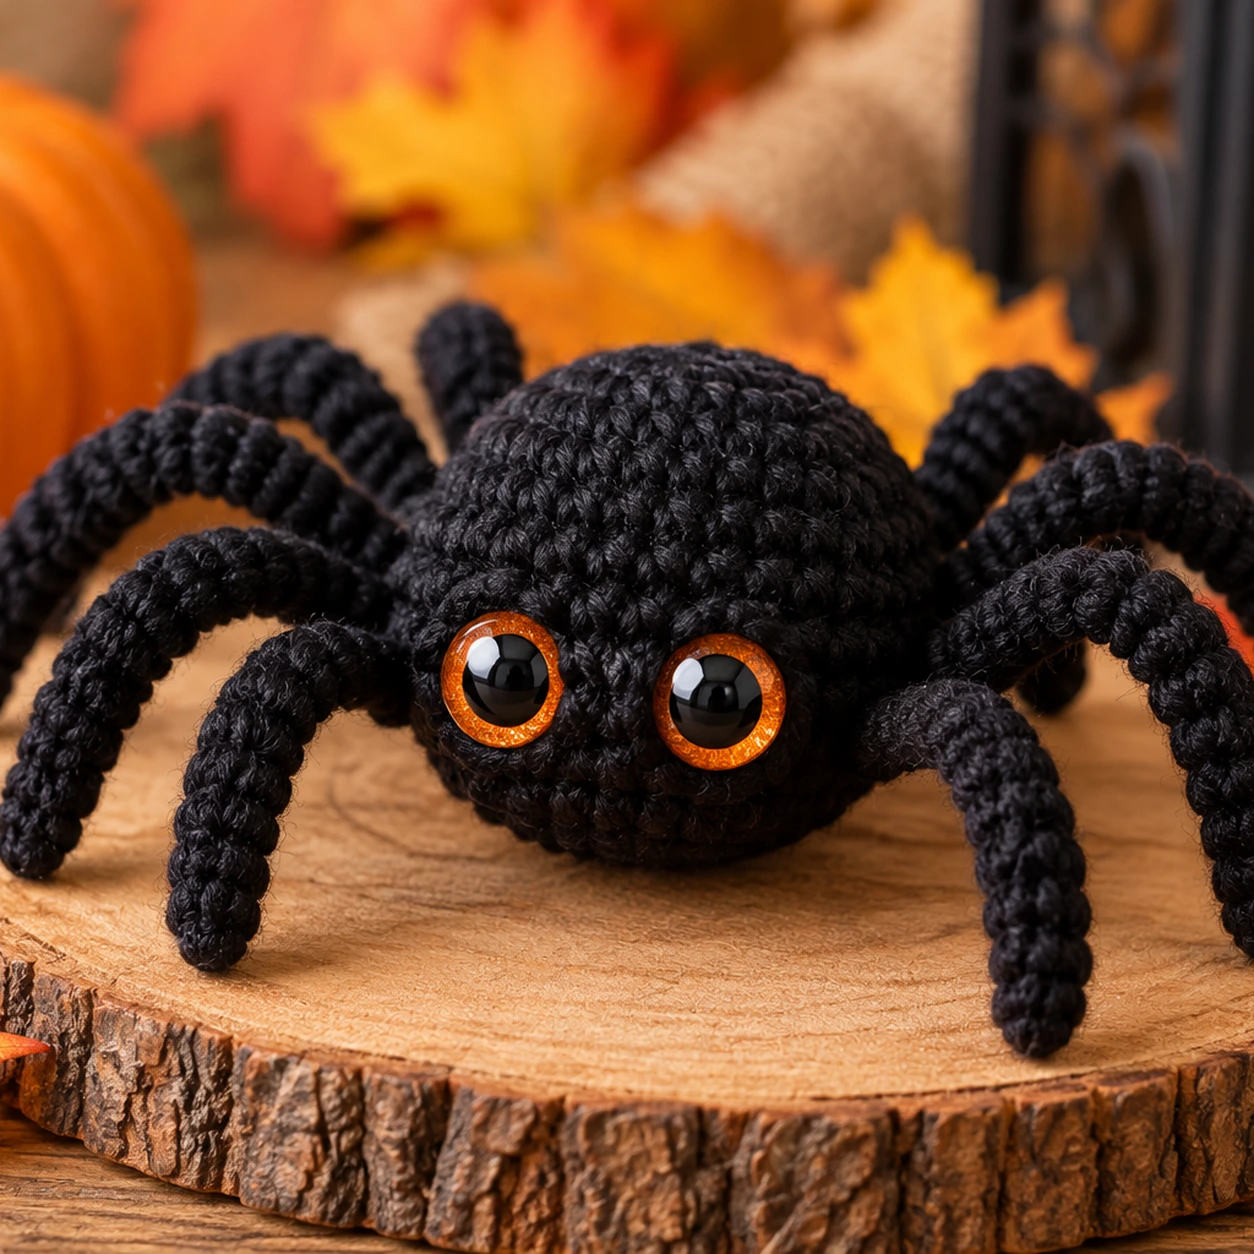
Crochet spider pattern: this quick Halloween project starts with one small stuffed amigurumi body. Instead of crocheting eight separate legs and sewing them on, you attach the yarn directly to the finished body and crochet each leg in place.
How do you crochet an easy no-sew spider?
Crochet a small oval body in continuous single crochet rounds, stuff it and close the opening. Rejoin the yarn along one side of the body and make four chain legs, slip stitching back down each chain before anchoring the next leg into the body. Repeat on the opposite side, then embroider a simple face.
The pattern works well as a small Halloween decoration because the spider is light, soft and quick to repeat. You can place one on a shelf, add a hanging loop, attach it to a wreath or make several for a garland.
This spider also pairs naturally with our easy crochet spider web pattern. Make both projects in the same yarn colors for a coordinated Halloween wall or window display.
What you will find in this pattern
How this crochet spider pattern is constructed
The spider has one stuffed body and eight surface-crocheted legs. There are no separate limbs to align or sew. Once the body is closed, you simply use the hook to join yarn into the outer stitches and build each leg from a short chain.
- ✓ One stuffed amigurumi body.
- ✓ Eight legs crocheted directly onto the body.
- ✓ No separate leg pieces to sew on.
- ✓ Embroidered face, so safety eyes are optional.
Materials for the crochet spider
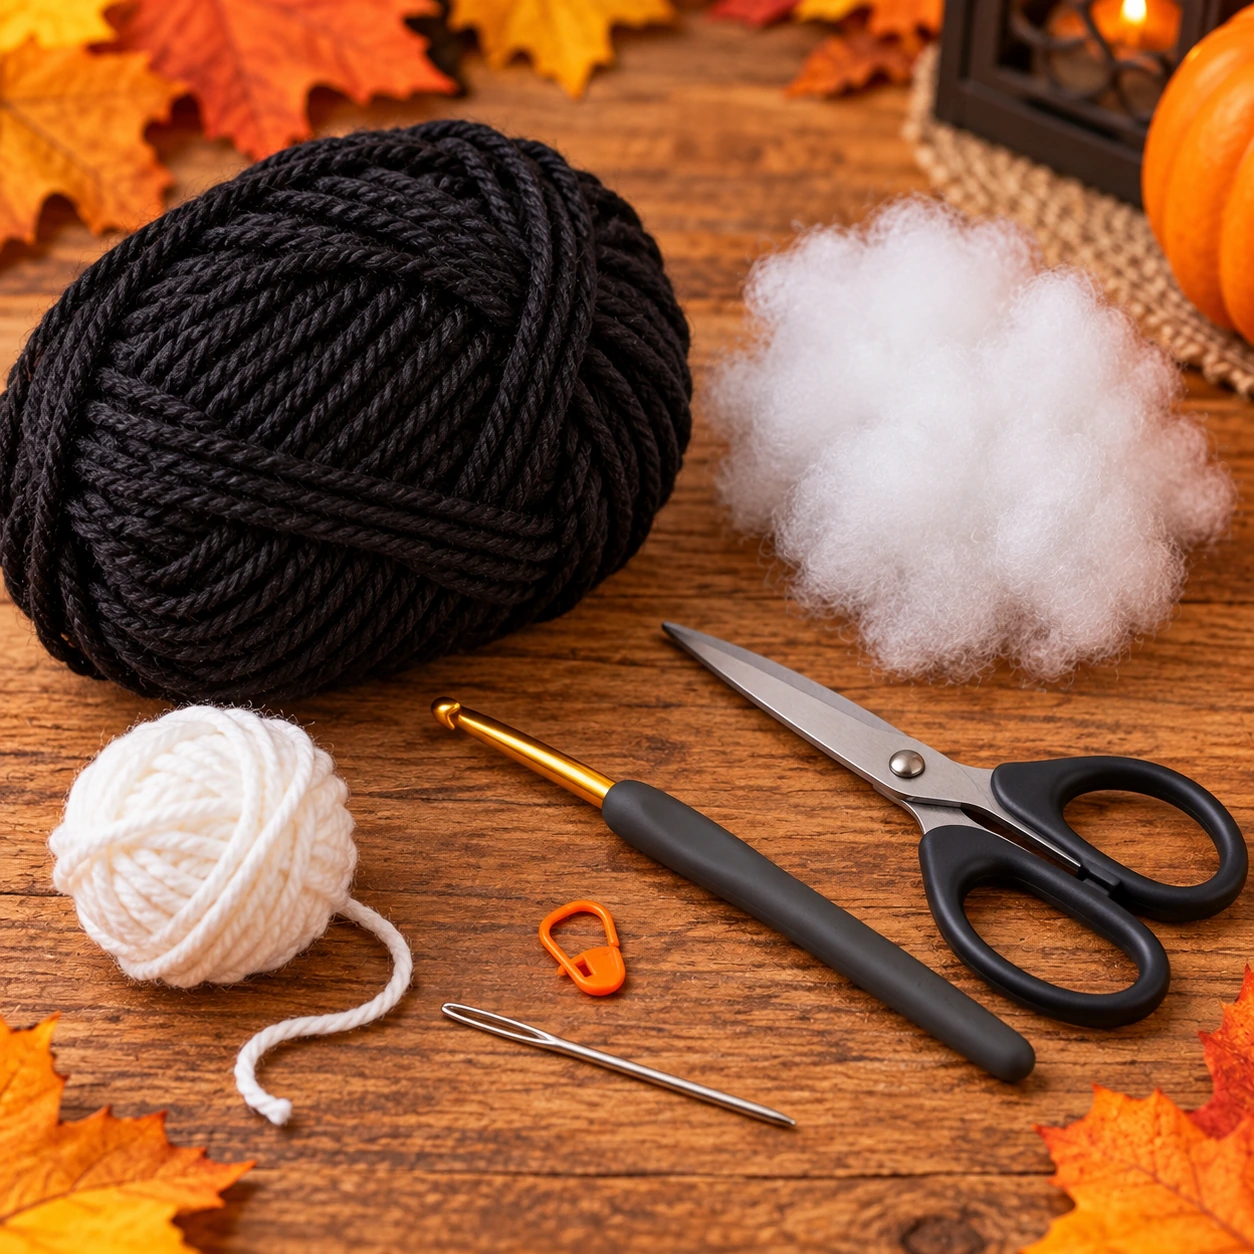
You will need
- 35 to 50 yd (32 to 46 m) medium weight #4 yarn
- small amount of white yarn for the face
- 3.5 mm crochet hook
- polyester fiberfill
- stitch marker
- tapestry needle
- scissors
Best yarn for this project
Smooth worsted weight acrylic or cotton blend yarn works well. Black gives the most traditional Halloween look, but charcoal, purple, orange or fuzzy brown can make the spider easier to see while you crochet.
Stitches and abbreviations
US crochet terms
- MR = magic ring
- ch = chain
- sc = single crochet
- inc = 2 sc in the same stitch
- dec = single crochet decrease
- sl st = slip stitch
- st / sts = stitch / stitches
Pattern notes
The body is worked in continuous spiral rounds. Do not join at the end of each round.
These abbreviations follow standard US crochet terminology. You can check the Craft Yarn Council crochet abbreviations for a reference list.
Finished size
Using medium weight #4 yarn and a 3.5 mm hook, the stuffed body should measure about 2.5 in (6.5 cm) long. The finished spider measures approximately 5 in (13 cm) across from leg tip to leg tip.
Gauge is not critical. Use a hook that creates a firm fabric so the fiberfill stays hidden between stitches.
Crochet the spider body
Start the body
Make a magic ring and work 6 single crochet stitches into the ring. Pull the ring closed and mark the first stitch.
Round 1: 6 sc
Increase to 12 stitches
Work 2 single crochet stitches in every stitch around.
Round 2: 6 inc = 12 sts
Increase to 18 stitches
Repeat one single crochet followed by one increase six times.
Round 3: (1 sc, inc) x 6 = 18 sts

Build the center of the body
Work one single crochet in every stitch for three rounds.
Rounds 4 to 6: 18 sc
Begin decreasing
Repeat one single crochet and one decrease six times.
Round 7: (1 sc, dec) x 6 = 12 sts
Stuff and close the body
Add fiberfill in small pieces. Work six decreases around. Cut the yarn, thread the tail through the remaining front loops and pull the opening closed.
Round 8: 6 dec = 6 sts
Add the legs to the crochet spider pattern
Lay the body horizontally. The closed end and starting magic ring should sit at the front and back of the spider, while the legs are added along the long sides.

Crochet spider pattern leg placement
Join yarn for the front leg
Insert the hook under a full stitch on one side of the body, approximately one round below the top curve. Pull up a loop and secure it with a slip stitch.
Leg 1: ch 8. Starting in the second chain from the hook, slip stitch in each chain back to the body. Slip stitch into the next body stitch.
Leg 2: ch 10. Slip stitch back along 9 chains. Slip stitch into the next body stitch.
Leg 3: ch 10. Slip stitch back along 9 chains. Slip stitch into the next body stitch.
Leg 4: ch 8. Slip stitch back along 7 chains. Fasten off and weave the yarn tail into the body.
Repeat on the opposite side
Turn the spider over and repeat the same sequence on the opposite side. Try to place each new leg directly across from the corresponding leg on the first side.
Finish the face

With white yarn, embroider two small vertical or round eyes near the front of the body. For a playful spider, add tiny black pupils with sewing thread or a short black stitch.
You can also embroider a small smile, two tiny fangs or pink cheeks. Keep the details simple so the face remains easy to read against the dark body.
For a hanging spider, join yarn at the top center of the body, chain 18 to 24 and slip stitch back into the same point to make a loop.
Easy spider variations
Classic black spider
Use black yarn with bright white embroidered eyes for the strongest Halloween contrast.
Purple spider
Deep purple makes the stitches easier to see while keeping the project spooky.
Fuzzy spider
Use fuzzy or chenille yarn for a plush spider. Keep a stitch marker in every round because the stitches are harder to see.
Spider garland
Make several spiders and attach their hanging loops to a long crochet chain for a Halloween mantel garland.
Common crochet spider mistakes
The body is lopsided
Count every increase and decrease round and keep your marker in place. Small amigurumi shapes change quickly if one stitch is missed.
One leg is longer
Count the chains in every leg. The first and fourth legs should match each other, and the two middle legs should match each other.
The legs twist too much
Keep your chain tension relaxed and avoid making the return slip stitches too tight.
Stuffing shows through
Use a slightly smaller hook or firmer tension and add the fiberfill in small amounts.
Frequently asked questions about the crochet spider pattern
Is this crochet spider pattern suitable for beginners?
Yes. You need a magic ring, single crochet, simple increases and decreases, chains and slip stitches.
Do I have to sew the legs onto the body?
No. The legs are crocheted directly from stitches on the finished body, so there are no separate leg pieces to sew on.
Can I make the legs longer?
Yes. Add more chains to each leg, then slip stitch back along the chain. Keep matching legs the same length.
Can I use plush yarn?
Yes. Plush yarn creates a larger fuzzy spider. Use a suitable hook and keep careful count because the stitches are less visible.
Can I hang the spider from a web?
Yes. Add a chain loop or long yarn strand to the top of the body and attach it to a crochet web, wreath or garland.
Can I make the spider smaller?
Use DK or sport weight yarn with a smaller hook. The stitch counts can stay the same while the finished spider becomes smaller.
Quick pattern to save
- Body R1: 6 sc in MR.
- R2: inc around = 12.
- R3: (1 sc, inc) x 6 = 18.
- R4 to R6: 18 sc.
- R7: (1 sc, dec) x 6 = 12.
- Stuff the body.
- R8: 6 dec = 6. Close.
- Side 1 legs: ch 8, ch 10, ch 10, ch 8. Slip stitch back along each chain.
- Repeat the four legs on the opposite side.
- Embroider the face and add an optional hanging loop.
Rimraam tip
Before making the second side of legs, place the spider flat on the table and note where the first four legs enter the body. Matching those positions on the opposite side makes the finished spider sit more evenly.
A quick little spider for spooky season
One small stuffed body and eight directly crocheted legs are enough to make a Halloween spider for webs, wreaths, garlands and shelf decor.
Note: finished size, yarn use and working time are approximate and can vary with yarn, hook size, tension and stuffing.
Helpful no-sew crochet spider video tutorial
If you want to watch a no-sew spider construction before starting, this English tutorial from crochetcalls shows a quick beginner amigurumi spider with the legs worked as part of the project. The construction and stitch counts differ from the Rimraam version, so follow the written instructions above for this pattern.
Video: external English-language tutorial on YouTube. The Rimraam written pattern above remains the main pattern for this project.