

Crochet black cat pattern: this small Halloween cat is built from simple amigurumi shapes. The head and body are worked as one piece in continuous single crochet rounds, then you add two pointed ears, a curved tail and four small paws. A pink nose and light-colored whiskers make the face easy to see against the black yarn.
How do you crochet an easy black cat?
Crochet the head and body from the top down in continuous single crochet rounds. Shape the head with increases and decreases, narrow the neck, then increase again for the body. Crochet two triangle ears, four small paws and one narrow tail separately. Sew the pieces in place, add the eyes, embroider the nose and whiskers, then gently curve the tail.
The construction is simple enough to repeat once you understand basic amigurumi shaping. Most of the project uses single crochet, increases and invisible decreases, so there are no complicated stitch combinations to memorize.
Black yarn gives the cat its classic Halloween look, but the same pattern also works in gray, cream, orange or striped colors. Make one for a shelf display, add it to a Halloween basket, or crochet several cats in different colors for a small handmade collection.
What you will find in this pattern
A crochet cat made from simple amigurumi pieces
The head and body form one continuous piece, which reduces sewing and helps the finished cat sit upright. The remaining parts are small and quick to crochet.
- ✓ Head and body are crocheted as one piece.
- ✓ Two flat triangle ears are sewn to the head.
- ✓ Four small paws help the cat sit securely.
- ✓ A narrow crochet tube becomes the curved tail.
Materials for the crochet black cat
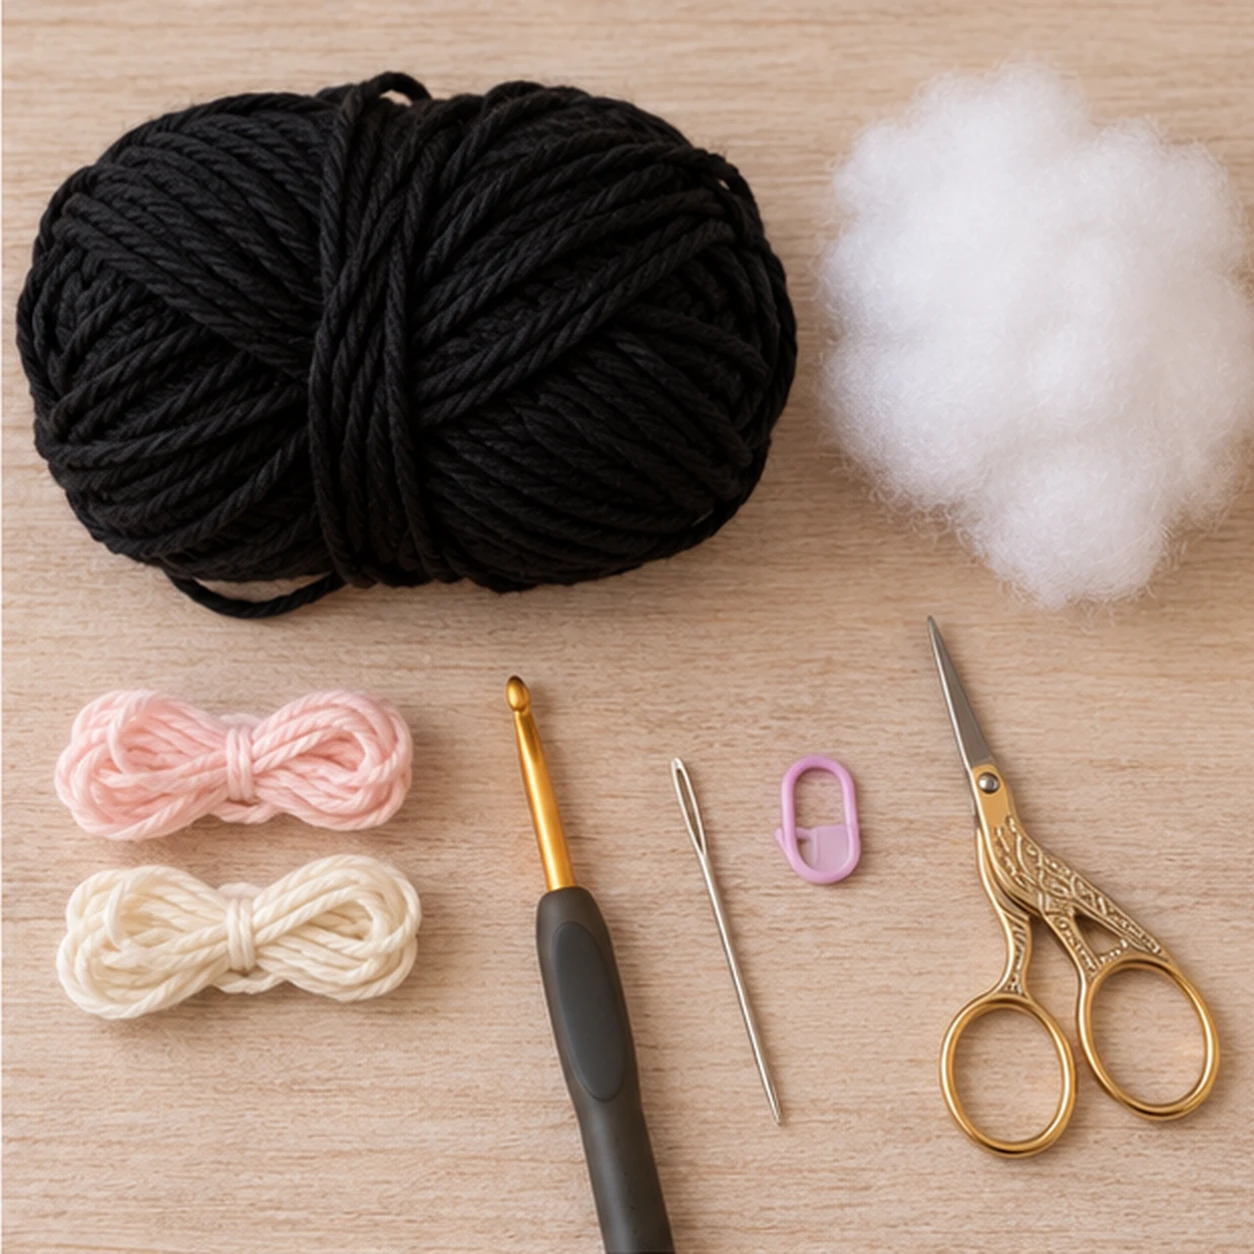
You will need
- 80 to 110 yd (73 to 101 m) medium weight #4 black yarn
- small amount of pink yarn for the nose and optional ear details
- small amount of cream or white yarn for whiskers
- 3.5 mm crochet hook
- 10 to 12 mm safety eyes or black embroidery yarn
- polyester fiberfill
- stitch marker
- tapestry needle
- scissors
Which yarn works best?
A smooth worsted weight acrylic or cotton blend works well because the stitches stay easy to identify. If black yarn is difficult to see, make your first cat in charcoal gray and return to black once the shaping feels familiar.
Stitches and abbreviations
US crochet terms
- MR = magic ring
- ch = chain
- sc = single crochet
- inc = 2 sc in the same stitch
- dec = invisible single crochet decrease
- sl st = slip stitch
- st / sts = stitch / stitches
Pattern notes
The head, body, tail and paws are worked in continuous spiral rounds. Do not join unless the pattern specifically says to do so.
Move the stitch marker to the first stitch of every new round and stuff gradually rather than waiting until the final round.
The abbreviations in this pattern follow standard US crochet terminology. You can also review the Craft Yarn Council crochet abbreviations.
Finished size and gauge
Using medium weight #4 yarn and a 3.5 mm hook, the finished cat measures approximately 5.5 to 6.5 in (14 to 16.5 cm) tall, not including the raised tail.
Exact gauge is not essential for amigurumi, but the fabric should be firm enough that the fiberfill does not show between stitches. If your stitches look loose, move down one hook size.
Crochet the head and body
Begin at the top of the head and continue directly into the body. The narrow rounds between the two sections form the neck.

Round 1: 6 sc in MR. (6)
Round 2: inc in each st around. (12)
Round 3: (1 sc, inc) x 6. (18)
Round 4: (2 sc, inc) x 6. (24)
Round 5: (3 sc, inc) x 6. (30)
Rounds 6 to 10: sc in each st around. (30)
Round 11: (3 sc, dec) x 6. (24)
Round 12: (2 sc, dec) x 6. (18)
Round 13: (1 sc, dec) x 6. (12)
Round 14: inc in each st around. (24)
Round 15: (3 sc, inc) x 6. (30)
Round 16: (4 sc, inc) x 6. (36)
Rounds 17 to 22: sc in each st around. (36)
Round 23: (4 sc, dec) x 6. (30)
Round 24: (3 sc, dec) x 6. (24)
Round 25: (2 sc, dec) x 6. (18). Begin stuffing the body firmly.
Round 26: (1 sc, dec) x 6. (12). Add the final stuffing.
Round 27: dec x 6. (6). Fasten off and close the opening.
Crochet the ears and tail

Ears – make 2
Foundation: ch 4.
Row 1: sc in the 2nd ch from hook and in the next 2 ch. 3 sts. Ch 1, turn.
Row 2: dec over the first 2 sts, sc in the last st. 2 sts. Ch 1, turn.
Row 3: dec over the final 2 sts. Fasten off with a long sewing tail.
Tail
Round 1: 6 sc in MR. (6)
Rounds 2 to 18: sc in each st around. (6)
Add only a very small amount of stuffing as you work. Fasten off with a long sewing tail. Bend the finished tail gently into a curve before attaching it.
For pink inner-ear details, embroider a small triangle inside each ear before sewing the ears to the head. Keep the pink stitches a little away from the black outer edge so the dark border remains visible.
Crochet the paws
Front paws – make 2
Round 1: 6 sc in MR. (6)
Round 2: inc in each st around. (12)
Rounds 3 to 6: sc in each st around. (12)
Round 7: (1 sc, dec) x 4. (8)
Stuff lightly, flatten the opening and fasten off with a long sewing tail.
Back paws – make 2
Round 1: 6 sc in MR. (6)
Round 2: inc in each st around. (12)
Rounds 3 to 4: sc in each st around. (12)
Stuff lightly, flatten the opening and fasten off with a long sewing tail.
Optional: use pink yarn to add two or three tiny straight stitches to the front of each paw for simple toe details.
Assemble the crochet black cat

- Sew on the ears: position them near the outer top edges of the head. Check that both points angle upward evenly before sewing the bases in place.
- Attach the front paws: place them vertically on the lower front of the body. Keep a small gap between them.
- Attach the back paws: sew one to each lower side of the body so the cat has a stable sitting position.
- Sew on the tail: attach the base low on the back or side of the body. Use a few extra stitches at the base so the tail stays upright.
- Embroider the nose: make a small pink triangle between and slightly below the eyes, then add one short vertical stitch underneath.
- Add whiskers: use cream or white yarn to make two or three short straight stitches on each side of the face.
- Shape the cat: adjust the ears, paws and tail with your fingers, then weave in every remaining yarn end.
Common crochet cat mistakes
The head looks uneven
Count every increase and decrease round. Small amigurumi shapes change quickly when even one stitch is missed.
The stuffing shows through
Use firmer tension or a smaller crochet hook. Add fiberfill in small pieces so you can shape the body without stretching the stitches.
The ears are not symmetrical
Pin both ears in place before sewing. Look at the cat directly from the front and adjust the height and angle until the two sides match.
The cat tips forward
Move the back paws slightly farther to the sides and avoid overstuffing the head. A firmer, flatter base helps the cat sit upright.
More Halloween crochet ideas
Frequently asked questions about crochet black cats
Is this crochet black cat pattern suitable for beginners?
It is best for an advanced beginner who already knows single crochet, a magic ring, increases and decreases. The separate parts are simple shapes and the sewing is straightforward.
Can I crochet the cat in another color?
Yes. Gray, cream, orange, brown and white all work with the same pattern. You can also use a different color for the paws, ears or tail.
How can I see black stitches more easily?
Work under a bright lamp and place a pale towel or sheet of paper underneath your project. The contrast makes the top loops easier to identify.
Do I need to stuff the tail?
Only a small amount is needed. Overstuffing makes the narrow tail stiff and harder to curve. A lightly stuffed tail is easier to shape.
Can I make the cat without safety eyes?
Yes. Embroidered eyes work well and are the better option when making the cat for a baby or young child.
Quick pattern to save
- Start the head with 6 sc in a magic ring and increase to 30 sts.
- Work 5 even rounds, then decrease to 12 sts for the neck.
- Increase again to 36 sts for the body.
- Work 6 even body rounds, then decrease and close the base.
- Make two small triangle ears.
- Make one narrow 18-round tail and four small paws.
- Sew the ears, paws and tail securely to the body.
- Add the eyes, pink nose, whiskers and optional pink ear or toe details.
Rimraam tip
Do not sew every piece immediately. Pin the ears, front paws, back paws and tail first, then look at the cat from the front and both sides. A few millimeters of adjustment can make the finished cat look much more balanced.
A little black cat for your Halloween crochet collection
Once you have made the first cat, try changing the yarn color, facial details or paw embroidery to give the same simple pattern a completely different personality.
Note: finished size and yarn use are approximate and can vary with yarn, hook size, stuffing and tension. This Rimraam pattern should be checked on a sample before publication if exact finished measurements are important.
Helpful crochet black cat video tutorial
If you want to watch the general construction of a small Halloween cat, this English tutorial from Little Crochet Farm shows the head, ears, paws, eyes, tail, sewing and facial embroidery. Its stitch counts and construction are different from the Rimraam pattern above, so use the written instructions here for this version.
Video: external English-language tutorial on YouTube. The Rimraam written instructions above remain the main pattern for this project.
2 thoughts on “Easy Crochet Black Cat Pattern for Halloween”