
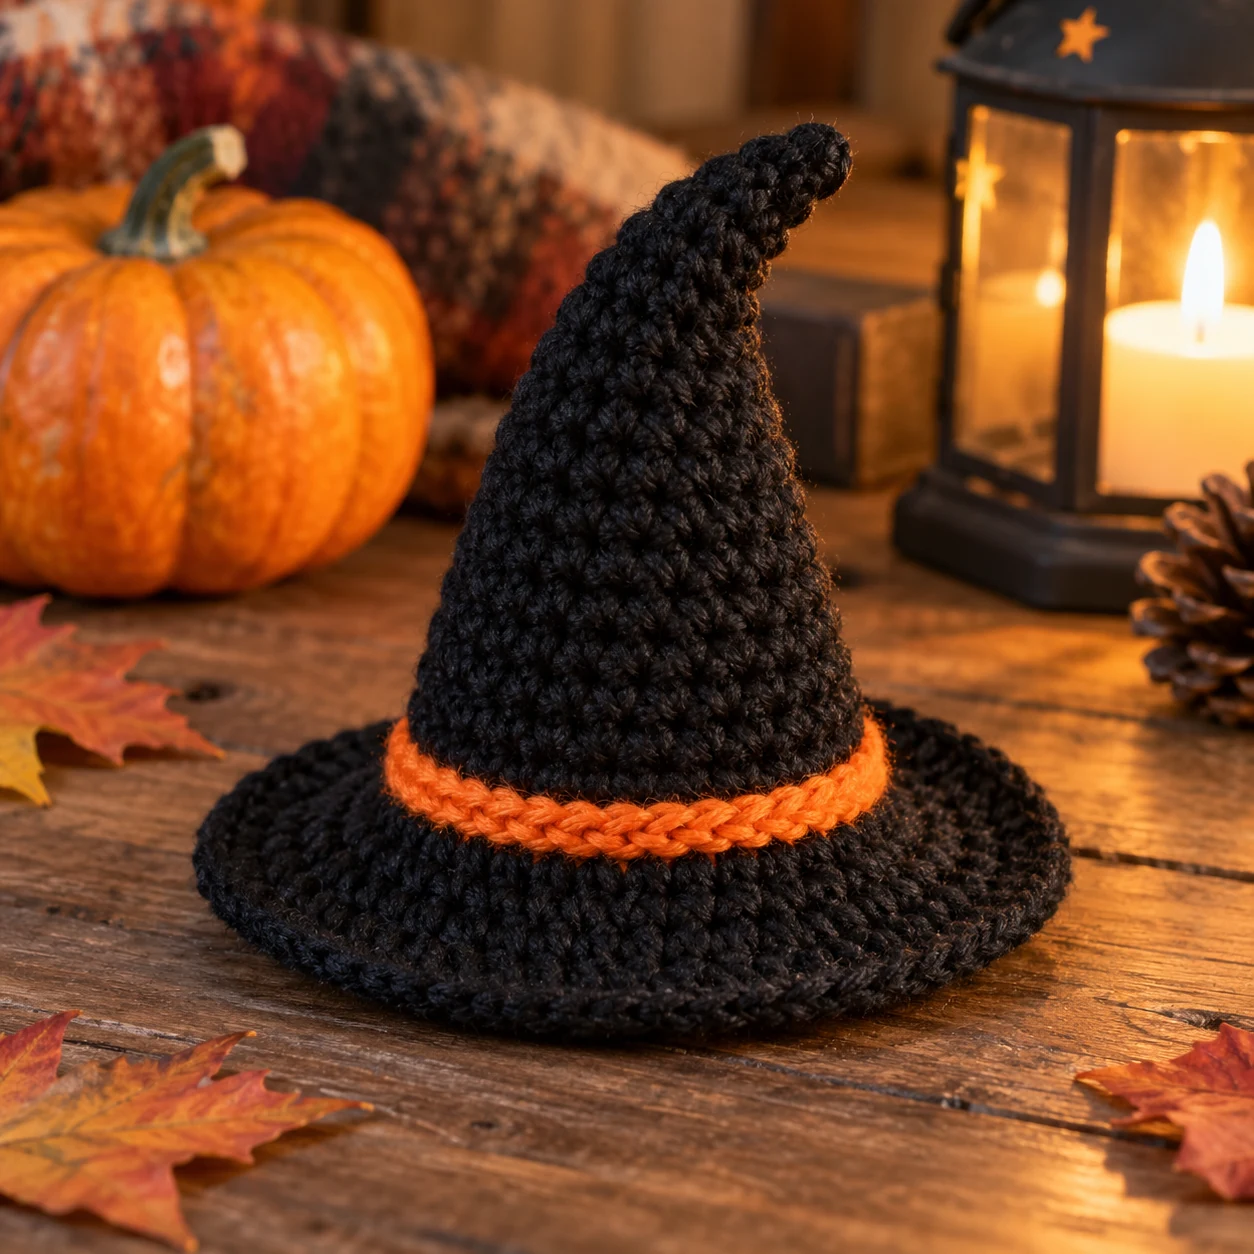
Crochet witch hat pattern: this miniature Halloween hat is worked from the pointed tip downward in continuous single crochet rounds. Small, evenly spaced increases create the cone, and the brim is worked into the front loops so it turns outward instead of continuing straight down.
How do you crochet a mini witch hat?
Start with four single crochet stitches in a magic ring. Alternate plain rounds with small increase rounds until the cone reaches 16 stitches. Work the brim in the front loops only, increasing by four stitches on each of the next three rounds. Finish with one plain brim round, then add an optional orange surface-slip-stitch band around the base of the cone.
The slow increase pattern gives the hat a tall pointed silhouette without creating sudden bumps. Because the cone and brim are one piece, there is almost no assembly.
Use the finished hat as a Halloween ornament, pumpkin topper, amigurumi accessory, shelf decoration, gift topper or garland piece. Black and orange are classic, but dark purple, charcoal, forest green or burgundy also work beautifully.
What you will find in this pattern
One piece from point to brim
The hat starts with only four stitches. Every second round adds two stitches, so the cone widens gradually instead of flaring too quickly. Once the base of the cone reaches 16 stitches, the brim begins.
- ✓ The cone and brim are one piece.
- ✓ Only single crochet and increases are needed.
- ✓ Front-loop crochet makes the brim turn outward.
- ✓ The contrast band can be added without sewing.
Materials for the crochet witch hat
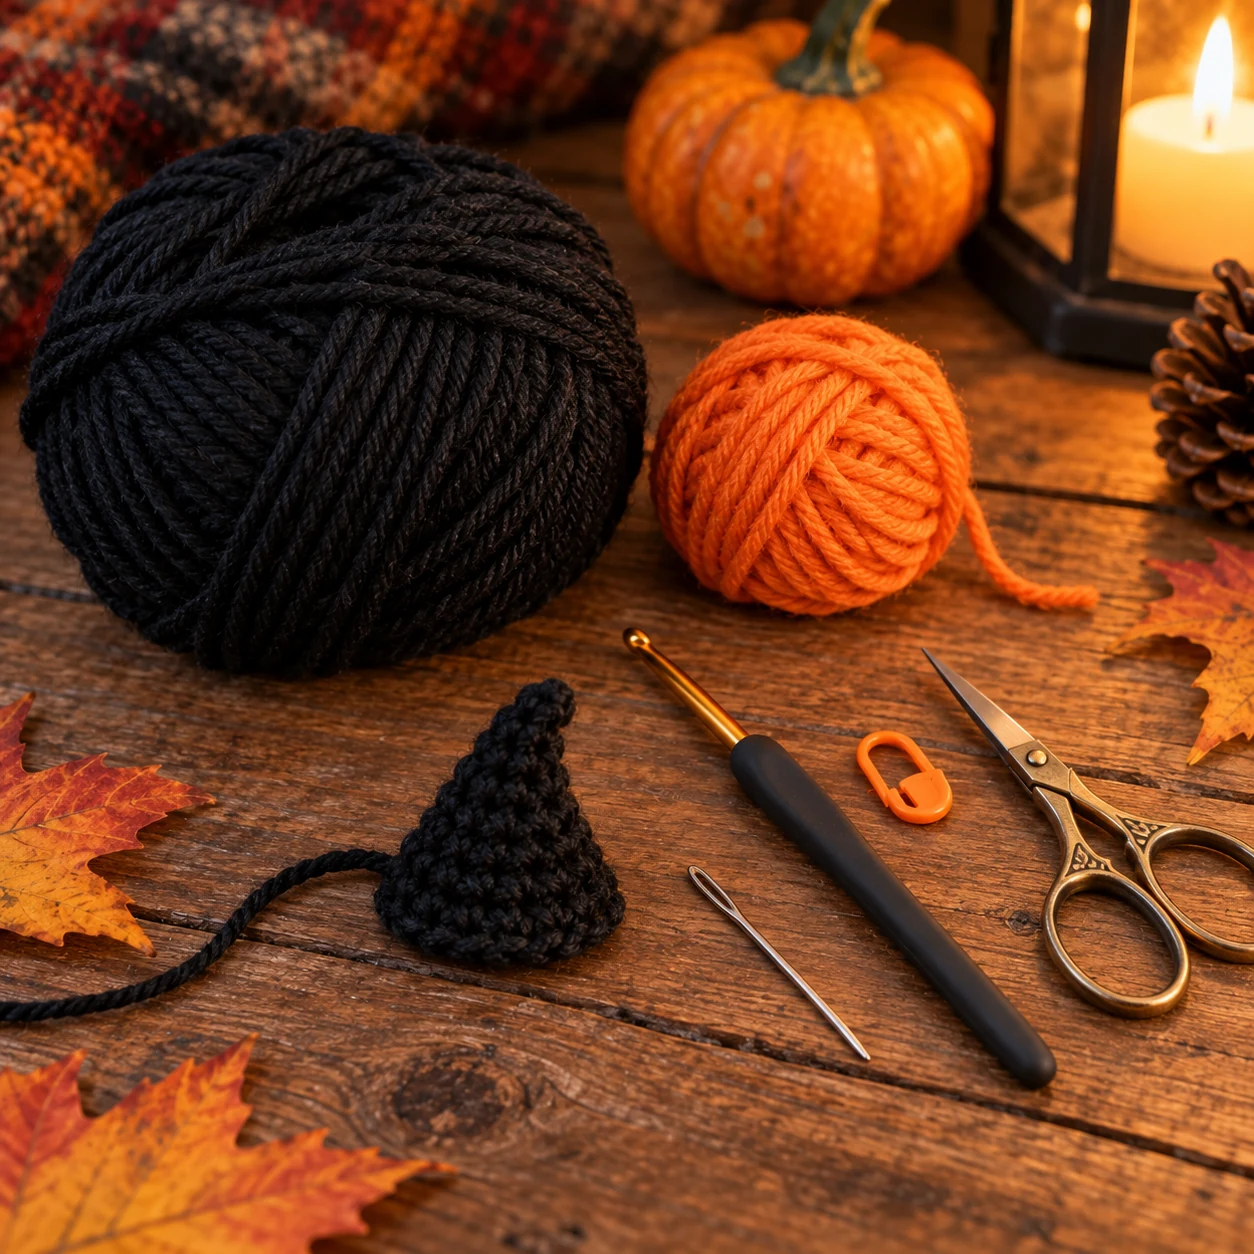
You will need
- 25 to 35 yd (23 to 32 m) medium weight #4 yarn in black or dark purple
- small amount of orange, gold or green yarn for the band
- 4 mm crochet hook
- stitch marker
- tapestry needle
- scissors
Which yarn works best?
A smooth acrylic or cotton-blend worsted yarn gives the cone enough structure to stand up. Very soft or fuzzy yarn can make the brim floppy and hide the stitch definition.
Stitches and abbreviations
US crochet terms
- MR = magic ring
- sc = single crochet
- inc = 2 sc in the same stitch
- sl st = slip stitch
- FLO = front loop only
- BLO = back loop only
- st / sts = stitch / stitches
Pattern notes
Work the cone in continuous spiral rounds. Do not join after each round. Move the stitch marker to the first stitch of the new round.
The brim begins in the front loops only. The unused back loops create a neat ridge that also gives you a clear place to add the contrast band.
The abbreviations above follow standard US crochet terminology. You can also review the Craft Yarn Council crochet abbreviations.
Finished size
With medium weight #4 yarn and a 4 mm hook, the finished mini hat should measure about 3 to 3.5 in (7.5 to 9 cm) tall and approximately 3.5 to 4 in (9 to 10 cm) across the brim.
Gauge is not critical for this decorative project. Use a hook that produces a firm fabric so the cone keeps its shape.
Crochet the pointed cone
Start the tip
Make a magic ring and crochet 4 single crochet stitches into the ring. Pull it closed and place a marker in the first stitch.
Round 1: 4 sc
Hold the narrow point
Work one single crochet in each stitch around.
Round 2: 4 sc
Increase to 6 stitches
Repeat one single crochet and one increase twice around.
Round 3: (1 sc, inc) x 2 = 6 sts
Continue the cone
Work one plain round with 6 single crochet stitches.
Round 4: 6 sc
Increase gradually
Continue alternating an increase round with a plain round. Each increase round adds 2 stitches.
R5: 8 sts, R6: 8, R7: 10, R8: 10, R9: 12, R10: 12

Finish the base of the cone
Keep the same rhythm for four more rounds: increase to 14 stitches, work one plain round, increase to 16 stitches, then work one final plain round.
R11: 14 sts, R12: 14, R13: 16, R14: 16
Crochet the flared brim
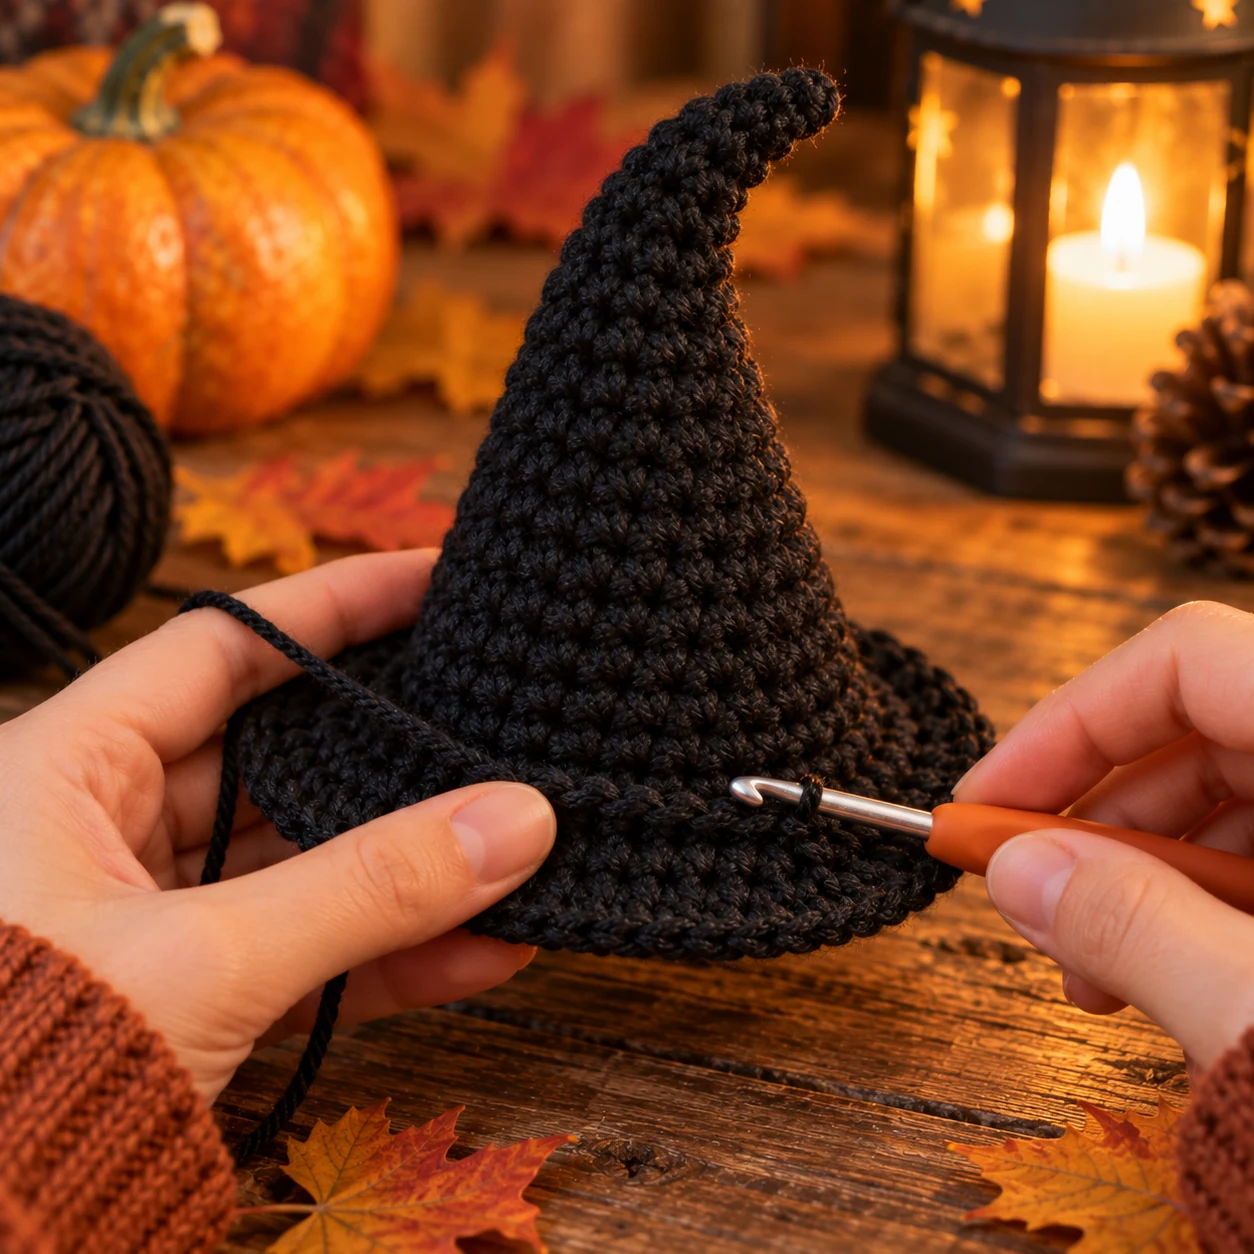
Turn the fabric outward
Work in the front loops only. Repeat three single crochet stitches and one increase four times around.
Round 15 FLO: (3 sc, inc) x 4 = 20 sts
Widen the brim
Repeat four single crochet stitches and one increase four times.
Round 16: (4 sc, inc) x 4 = 24 sts
Create the final flare
Repeat five single crochet stitches and one increase four times.
Round 17: (5 sc, inc) x 4 = 28 sts
Finish the edge
Work one single crochet in every stitch around. Slip stitch in the next stitch, fasten off and weave in the yarn tail.
Round 18: 28 sc
Add an easy contrast band

Turn the hat so you can see the unused back loops from Round 14, directly above the brim.
With orange, gold or green yarn, join in any back loop. Work one surface slip stitch through each of the 16 back loops around the base of the cone. Join to the first slip stitch and fasten off.
For an extra detail, use yellow yarn to embroider a tiny square buckle over the front of the band.
Shape the witch hat point
A straight point gives the hat a clean classic silhouette. For a crooked witch hat, gently bend the top third of the cone to one side.
If your yarn is soft, lightly mist the hat with water, shape the point and brim with your fingers, and let it dry in position. Always follow the care instructions for your yarn.
Do not use wire if the hat will be handled by children or attached to a toy. For simple seasonal decor, the crochet fabric alone is usually enough to hold the shape.
Common crochet witch hat mistakes
The cone leans to one side
Move your stitch marker every round and keep the two increases spaced apart. Concentrating increases in one area can twist the cone.
The brim hangs downward
Make sure Round 15 is worked through the front loops only. A firmer yarn or slightly smaller hook can also help the brim hold its shape.
The point looks blunt
Pull the starting magic ring tightly and keep the first few rounds firm. Four starting stitches create a sharper point than a wider beginning.
The contrast band looks uneven
Work one slip stitch into each unused back loop and keep the tension relaxed. Tight surface crochet can pull the cone inward.
Frequently asked questions about crochet witch hats
Is this mini crochet witch hat suitable for beginners?
Yes. You need a magic ring, single crochet, simple increases, front-loop crochet and slip stitches. There are no decreases or complicated stitch combinations.
Does the hat need stuffing?
No. The mini hat is hollow. A firm yarn and tight stitches give the cone enough structure for decoration.
Why is the first brim round worked in the front loops only?
Front-loop crochet changes the direction of the fabric and helps the brim extend outward. It also leaves a ridge of back loops that can be used for the contrast band.
Can I make the hat bigger?
Yes. The easiest option is to use thicker yarn and a larger hook. For a much larger hat, continue the cone with the same gradual increase rhythm before starting the brim.
Can I use the hat on amigurumi?
Yes. The mini size works well as an accessory for dolls and amigurumi. Measure the head first and adjust the cone circumference if necessary.
How do I make the point look crooked?
Gently bend the top of the cone to one side and shape it with your fingers. Light blocking can help a soft yarn keep the bend.
Quick pattern to save
- R1: 4 sc in MR.
- R2: 4 sc.
- R3: (1 sc, inc) x 2 = 6.
- R4: 6 sc.
- R5: increase evenly to 8.
- R6: 8 sc.
- R7: increase evenly to 10.
- R8: 10 sc.
- R9: increase evenly to 12.
- R10: 12 sc.
- R11: increase evenly to 14.
- R12: 14 sc.
- R13: increase evenly to 16.
- R14: 16 sc.
- R15 FLO: (3 sc, inc) x 4 = 20.
- R16: (4 sc, inc) x 4 = 24.
- R17: (5 sc, inc) x 4 = 28.
- R18: 28 sc. Fasten off.
- Add a contrast surface-slip-stitch band around the unused back loops of Round 14.
Rimraam tip
Make the first hat in a lighter dark color such as charcoal or deep purple if black yarn is difficult to see. Once you understand where the increases go, black becomes much easier to work with.
A tiny witch hat for spooky season
A few yards of yarn and a handful of simple rounds are enough to make a Halloween hat for pumpkins, dolls, garlands and seasonal decor.
Note: finished size, yarn use and working time are approximate and can vary with yarn, hook size and tension. This Rimraam pattern is editorially developed and should be checked on a sample before publication if exact finished measurements are important.
Helpful mini crochet witch hat video tutorial
If you want to watch the general construction of a miniature witch hat, this English tutorial from Club Crochet shows a small top-down hat made in the round with a pointed cone, brim and color details. The stitch counts are different from the Rimraam pattern above, so follow the written Rimraam instructions for this version.
Video: external English-language tutorial on YouTube. The Rimraam written instructions above remain the main pattern for this project.